Celebrating 35+ Years

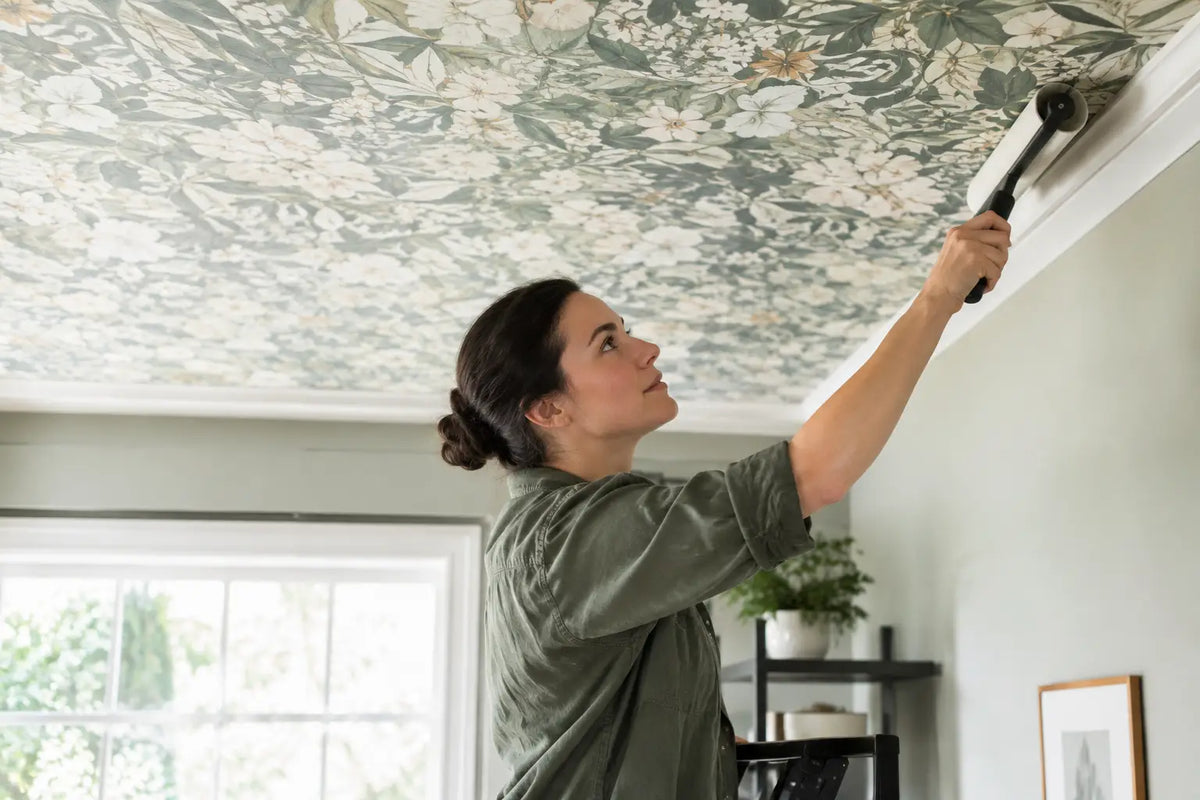
How to Use Wallpaper on Ceilings With Confidence
A ceiling is the one surface nearly every guest overlooks - until it becomes the most memorable part of the room. Learning how to use wallpaper on ceilings gives you a way to bring color, pattern, texture, and personality overhead without relying on another painted accent wall. A soft botanical can make a bedroom feel tucked away and restful; a tailored stripe can lend structure to a dining room; a small-scale print can give a powder room its own point of view.
Ceiling wallpaper is not right for every room or every material, but when the pattern, scale, and installation plan are considered together, it can transform a familiar space into one that feels thoughtfully finished.
Start With the Room's Point of View
Before choosing a roll, consider what the ceiling needs to do for the room. In a room with plain walls and simple furnishings, overhead wallpaper can become the main decorative statement. In a room already layered with a bold rug, colorful upholstery, or dramatic art, a quieter texture or tonal print often creates better balance.
Ceiling height matters, but it should not stop you from considering pattern. A darker wallpaper can visually lower a very tall ceiling and make a large room feel more inviting. In a low-ceilinged space, choose a design with an open ground, a lighter color palette, or a small repeating motif rather than a dense, high-contrast pattern. This keeps the effect intentional instead of heavy.
Powder rooms, laundry rooms, bedrooms, dining rooms, and nurseries are especially good candidates because the ceiling can be appreciated at a slower pace. A formal living room can also carry a more decorative overhead treatment, particularly when paired with substantial trim, a ceiling medallion, or classic furnishings. For kitchens and full bathrooms, humidity and cleanability deserve extra attention. Select a wallpaper material rated for the room's conditions, and make sure ventilation is working well.
How to Use Wallpaper on Ceilings: Choose the Right Material
A beautiful pattern is only part of the decision. The wallpaper's construction affects how it handles, adheres, and performs above your head.
Non-woven wallpaper is a popular choice for ceilings because it is dimensionally stable and is often installed using a paste-the-wall method. That can make positioning easier than handling a pasted sheet, although a ceiling installation still benefits from two people. Many printed non-wovens offer the style range homeowners want, from botanicals and geometrics to traditional damasks and modern abstracts.
Vinyl wallcovering can be a smart option in spaces where wipeability matters. It is generally more practical for active rooms, but it may be heavier than a standard non-woven. Use the adhesive recommended for that specific product and do not assume one paste works for every wallcovering.
Natural materials such as grasscloth, cork, and certain woven textures create exceptional depth overhead. They also require more planning. Seams may be visible by design, colors can vary from panel to panel, and natural fibers may not be ideal in rooms with regular moisture. These materials are often best installed by an experienced wallpaper professional, especially when the ceiling has multiple obstacles or the room is large.
Avoid treating paintable wallpaper, flock, crystal-beaded styles, or heavily textured specialty papers as interchangeable with a standard printed paper. Their weight, surface character, and installation requirements can differ significantly. Always review the manufacturer's instructions before ordering and before opening adhesive.
Let Pattern Scale Guide the Selection
Sampling is particularly valuable for ceiling wallpaper. A pattern that looks delicate on a small swatch may feel far more active when repeated across 100 square feet overhead. Order or view a sample, then tape it to the ceiling for a day or two. Check it in morning light, evening lamp light, and from the room's main seating position.
Large-scale murals and oversized florals can be spectacular on a broad, uninterrupted ceiling. They are less forgiving around recessed lighting, vents, beams, and ceiling fans. If the ceiling has many cutouts, a small-scale repeat, subtle geometric, grasscloth-inspired texture, or soft cloud-like design usually creates a cleaner result.
Think about direction as well. Stripes can run the length of a narrow room to emphasize its shape, or across its width to make it feel less like a corridor. A directional botanical or scenic paper should be viewed from the doorway and the primary focal point in the room before you decide which way is up. It is far easier to establish the orientation on the floor than to reconsider it after the first length is pasted.
Measure for Coverage, Matching, and Waste
Measure the ceiling's length and width, then multiply them for the basic square footage. That number is a starting point, not the final order quantity. Wallpaper comes in rolls with specific widths, lengths, and pattern repeats, so coverage must be calculated by usable strips rather than square footage alone.
For a simple, non-directional pattern, allow extra material for trimming at each end and for the possibility of an imperfect first cut. For a straight match, drop match, or large repeat, plan for more waste because each strip must align with the one beside it. A 15 to 20 percent allowance is a sensible baseline, while a large repeat or a ceiling with numerous cuts may require more.
Buy all rolls from the same dye lot whenever possible. This is particularly important for natural wallcoverings, but it is a good habit for printed papers as well. Keep at least one uncut extra roll if the pattern is discontinued or if a future repair becomes necessary.
A wallpaper calculator can help organize the first estimate, but product details and pattern repeat should have the final say. If you are working with a high-value specialty material, confirm the calculation with a wallpaper expert before placing the order.
Prepare the Ceiling Like a Finish Surface
Wallpaper does not hide a rough ceiling. It can call attention to cracks, patches, peeling paint, nail pops, and uneven texture, especially under raking light from a window or chandelier. Remove old paper and adhesive completely, repair flaws, sand smooth, and vacuum away dust.
The ceiling should be clean, dry, sound, and properly primed. A wallpaper-specific primer improves adhesion, gives you a more uniform surface, and can make eventual removal less difficult. Do not apply wallpaper over a ceiling that is actively stained by water damage or has unresolved moisture issues. Find and correct the cause first.
If the ceiling has a heavy popcorn texture, installation is usually not a good idea until the texture has been removed or professionally skim-coated smooth. A lightly textured ceiling may still require smoothing, depending on the wallpaper and how much texture shows through the sample. This is a place where preparation determines whether the finished look feels polished.
Plan the Installation Before Opening the Paste
Ceiling wallpapering is a two-person job for most homeowners. The paper needs steady support along its full length, and an extra set of hands prevents stretching, folding, or accidental adhesion in the wrong place. For a large room, tall ceiling, expensive paper, or intricate match, professional installation can be the more economical choice when you consider material waste and the difficulty of working overhead.
Gather the correct adhesive and tools before beginning:
- A sharp snap-blade knife with plenty of replacement blades
- A smoothing brush or wallpaper smoother suited to the material
- A seam roller approved for the wallpaper surface
- A level or laser level, tape measure, and pencil
- A stable ladder or platform that lets both installers work safely
Apply paste exactly as the manufacturer directs. With paste-the-wall paper, coat the ceiling evenly without leaving dry spots. With traditional paper, paste and book each length according to instructions. Begin with the most visible line in the room, often near the entry or centered around a key architectural feature, so narrow trimmed pieces are less noticeable at the perimeter.
Work slowly, smooth from the center outward, and avoid pulling the paper taut. Trim only after the strip is secure, using a fresh blade frequently for clean edges. Wipe excess adhesive promptly with a damp sponge if the product instructions permit it. As each strip goes up, check the match from the floor as well as from the ladder. A slight alignment issue is easier to correct while the paste is still workable.
Finish the Room With Intention
The ceiling should feel connected to the rest of the room, not simply decorated for surprise. Repeat one color from the wallpaper in the drapery, bedding, rug, or a painted piece of furniture. If the paper is bold, keep surrounding wall color calm. If the ceiling treatment is textured and understated, you may have more freedom to add color elsewhere.
Trim can make the installation feel especially complete. Crisp white crown molding offers classic contrast, while trim painted in a color pulled from the wallpaper creates a more enveloping, tailored effect. In rooms without crown molding, a carefully cut edge can still look refined, but the ceiling line must be especially straight.
Wallpaper and Stuff offers samples and a broad selection of in-stock wallcoverings, making it easier to compare texture, color, and pattern scale before committing to an overhead statement. Whether you choose a quiet woven look or a vivid print, give the ceiling the same consideration you would a feature wall - it may become the detail that makes the whole room feel finished.